Easy Baskets Free Crochet Pattern for Beginners
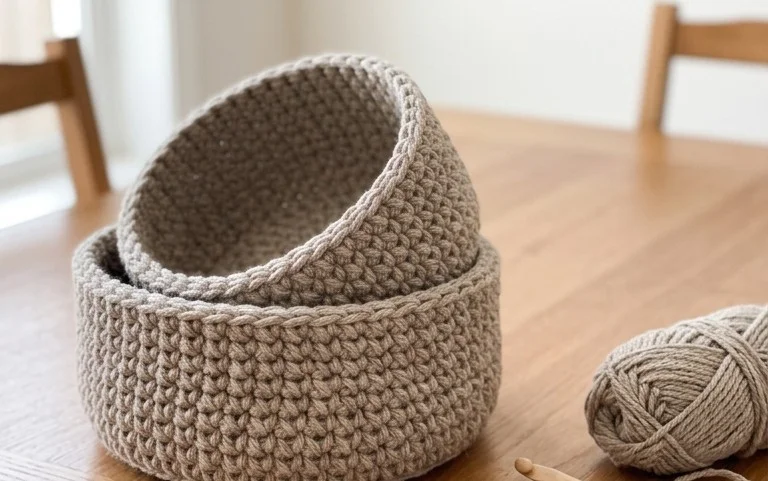
A tidy desk helps clear the mind, and these small crocheted containers are exactly what you need to organize stray paperclips and loose change. The dense, sturdy fabric holds its shape well, which is helpful if you plan to fill them with heavier items like sewing notions or spare buttons. You will use a basic single crochet stitch worked in a continuous spiral to build up the walls without dealing with messy seam lines. This project feels rewarding because you start with a flat circular base and watch it transform into a functional three-dimensional object within just two hours of work.
Why You Will Love This Pattern
This beginner-friendly project works up quickly using basic single crochet stitches, making it a perfect introduction to three-dimensional amigurumi construction. Because it requires only a small amount of yarn, you can easily pull from your existing stash to create a thoughtful handmade gift. The continuous round technique eliminates the need for joining each row, which keeps the surface smooth and professional without visible seams. You will find that the rhythmic, repetitive nature of these stitches offers a calming activity that you can easily complete in a single afternoon.
I finished this little project in just two hours and the instructions were clear enough that I did not have to restart once. It makes for such a cute desk accessory that I ended up making three more for my coworkers.
— Sarah, amigurumi enthusiast
Pattern Overview & Skill Level
- Skill Level: Beginner
- Approximate Time: 1 to 2 hours
- Construction: Amigurumi style worked in continuous rounds
- Finished Dimensions: 4 inches tall by 3 inches wide
Materials & Supplies Needed
- Yarn: Worsted weight (#4), 100% cotton, approximately 30 yards in your chosen color.
- Hook Size: 3.5 mm (US E-4) to ensure a tight fabric that prevents stuffing from showing through.
- Notions: Tapestry needle for weaving ends, stitch marker for tracking rounds, 6mm safety eyes, and polyester fiberfill stuffing.
- Yarn Substitutions: Acrylic worsted weight yarn can be used for a softer, squishier feel, though it may result in a slightly larger finished piece due to fiber elasticity.
Stitch Guide & Abbreviations (US Terms)
- MR: Magic Ring. A technique to start rounds by crocheting into a loop.
- ch: Chain.
- sc: Single crochet. Insert hook, yarn over, pull up a loop, yarn over, pull through two loops.
- inc: Increase. Work 2 sc into the same stitch to add one stitch.
- dec: Decrease. Use the invisible decrease method by working into the front loops of the next two stitches.
- st/sts: Stitch/stitches.
- sl st: Slip stitch.
Step-by-Step Pattern Instructions
Body
- Rnd 1: Start 6 sc in a MR (6 sts).
- Rnd 2: Work 2 sc in each st around (12 sts).
- Rnd 3: 1 sc, 1 inc repeat around (18 sts).
- Rnd 4: 2 sc, 1 inc repeat around (24 sts).
- Rnd 5: 3 sc, 1 inc repeat around (30 sts).
- Rnd 6 – 12: Work 1 sc in each st around (30 sts).
- Rnd 13: 3 sc, 1 dec repeat around (24 sts).
- Rnd 14: 2 sc, 1 dec repeat around (18 sts).
- Rnd 15: 1 sc, 1 dec repeat around (12 sts).
Assembly & Finishing
- Insert safety eyes between Rnd 9 and Rnd 10, spacing them 4 stitches apart.
- Firmly stuff the body with polyester fiberfill, ensuring the shape remains rounded and even.
- Rnd 16: Work 6 dec until the opening is fully closed (6 sts).
- Cut the yarn, leaving a 6-inch tail. Use the tapestry needle to weave the tail through the front loops of the remaining stitches and pull tight to close the hole securely.
- Secure the end inside the body and trim any excess yarn.
Care & Washing Instructions
- Hand wash in cool water using a gentle detergent to prevent fiber distortion.
- Lay the item flat on a clean towel to air dry completely, away from direct sunlight.
- Reshape the item while damp if it was compressed during the washing process.
Pro Tips & Common Mistakes to Avoid
- Maintain consistent tension throughout the project; if your loops look too loose, your stuffing will poke through the fabric.
- Always place a stitch marker in the first stitch of every round to avoid losing your place in the pattern.
- Hide your yarn ends by weaving them into the center of the stuffing rather than pulling them tightly against the surface stitches.
- Adjusting the hook size will change the finished size; a smaller hook creates a stiffer, smaller toy, while a larger hook creates a larger, softer toy that requires more stuffing.
Frequently Asked Questions
Can I use a different weight of yarn for this project?
You can use any yarn weight, but you must adjust your hook size accordingly. Use a hook that is one size smaller than what is recommended on the yarn label to maintain a dense fabric.
Is this pattern suitable for someone who has never made a toy before?
Yes, this pattern uses only basic stitches and focuses on simple increases and decreases, making it ideal for those new to amigurumi.
How do I keep my stitches from twisting while working in rounds?
Keep your tension even and check your stitch count at the end of every round. If you find your rounds are spiraling, ensure you are always working into the correct stitch of the previous round.
Am I allowed to sell the finished items made from this pattern?
You may sell finished items on a small scale, provided you credit the designer. Always check the specific terms of use provided by the pattern source if you intend to produce items for commercial sale.
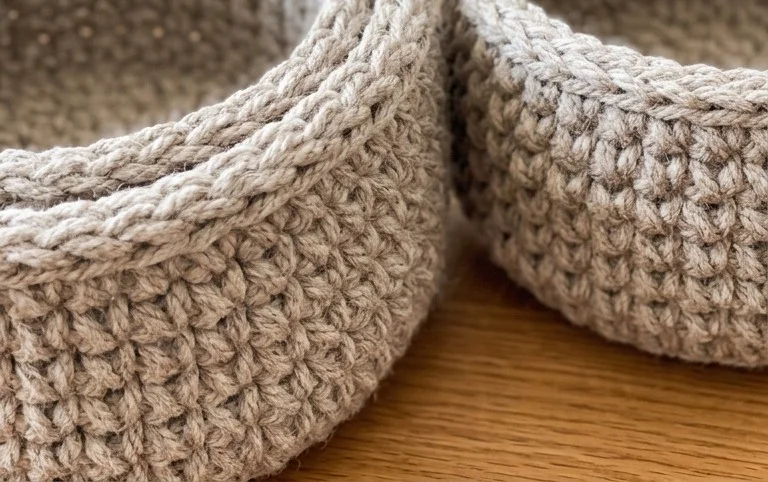
These small containers bring a sense of order to any tabletop while using up those lonely scraps of cotton yarn left over from larger blankets. You can easily adjust the size by increasing the rounds of the base or choosing a thicker yarn weight for a chunkier, more rustic look. Once you finish yours, post a photo of your work on your favorite social media site so others can see your color choices. Browse through the rest of the site for additional patterns to fill your workspace with similar handmade items.